Before this note
Recently I have build a in house tower server for self use, development, experiment of things.
I could try Kubernetes labs or Public OpenShift infrastructure but the cost of a machine satisfy a geek is huge. And deploy a cluster in bare-metal is something interesting also.
The server itself costs about 1 gram:
| Component | Detail |
|---|---|
| CPU | Intel Xeon E5-1650 V3 |
| Motherboard | Asus X99-ws/ipmi |
| Memory | 4 * 16GB Samsung DDR4 REG ECC 2133MHz |
| Disk | Micron Cricual BX500 240GB * 1 |
| Storage Disk | Micron Cricual BX500 960GB * 2 |
| Tower Case | Antec P101-Silent |
| Cooler | Noctua D15s |
| Power Supply | Super-flower LEADEX G 550 |
Topic about the hardware can be another time, this is capable for running a 6 node Kubernetes cluster with plenty of high speed storage.
The Kubernetes
Refer to https://kubernetes.io/
Kubernetes is a container orchestration platform designed by Google, with production grade performance.
The Kubernetes core is just an orchestration tool, we could say it's similar to an kernel, other layer like network, storage, container run time, cluster ingress is not included out of box unlike OpenShift which provides one stop solution.
This can be a benefit from another side: developer can have other tool implements those interface work easily for their own infrastructure or topology.
Virtual Machine
I those the more stable and relatively new version of OS for every node: CentOS 7.7, hosted in a RHEL 8, installation in libvirt and virt-manager is just simple as mount the ISO from CentOS website and install the minimal.
Each node gets 4 vCPUs and 8GB of RAM, vCPU can be shared, but ensure total RAM is important, otherwise it will only result of unexpected outage/shutdown.
In the first step, only one VM is created, after the preparation utilize clone function of libvirt is convince for deploy in a scale.
Binaries
First is to download binary in the node, I uses package manager yum to manage the version of software, in case of future upgrade.
CRI-O my first selection for CRI (Container Run-time Interface) Refer to https://kubernetes.io/docs/setup/production-environment/container-runtimes/, the docker is not natively compatible with CRI I will just pass that, version 1.15 is not in release repo so I use candidate repo to replace it:
yum-config-manager --add-repo=https://cbs.centos.org/repos/paas7-crio-115-candidate/x86_64/os/
yum install cri-o -y --nogpgcheck
systemctl enable --now crio
This should give back:

And now crictl command is available for use, crictl info can give back the basic information about CRI-O.
Notice that install CRI-O will generate configuration file in /etc/cni/net.d/ folder, the default config will resulting container pod running in subnet 10.88.0.0/16; But if the configuration file is missing, crictl info will give back Network not ready signal, later in flannel (CNI) installation we will fix that.
Kubeadm is used in Kubernetes bootstrapping, Refer to: https://kubernetes.io/docs/setup/production-environment/tools/kubeadm/install-kubeadm/
The tool is for install the initial components like etcd (Cluster database), API server, Proxy, and CoreDNS.
Use command:
cat <<EOF > /etc/yum.repos.d/kubernetes.repo
[kubernetes]
name=Kubernetes
baseurl=https://packages.cloud.google.com/yum/repos/kubernetes-el7-x86_64
enabled=1
gpgcheck=1
repo_gpgcheck=1
gpgkey=https://packages.cloud.google.com/yum/doc/yum-key.gpg https://packages.cloud.google.com/yum/doc/rpm-package-key.gpg
EOF

yum install -y kubelet kubeadm kubectl --disableexcludes=kubernetes
Just hold on to start kubelet now, some configuration file needed will be generate by kubeadm later.
To install components need by Kubernetes, and for SELinux, I just disabled it for privileged pods will be running in Kubernetes:
# Set SELinux in permissive mode (effectively disabling it)
setenforce 0
sed -i 's/^SELINUX=enforcing$/SELINUX=permissive/' /etc/selinux/config
Preparation
Now we can do some prepare for kubeadm init.
First if CRI-O is the select for CRI, like it is using systemd as cgroup, kubelet should also include that in start arguments: modify /etc/sysconfig/kubelet for CentOS
KUBELET_EXTRA_ARGS=--cgroup-driver=systemdAlternatively change service configuration file is also working, In my case here change the /usr/lib/systemd/system/kuberlet.service.d/10-kubeadm.conf , This file is generate by kubeadm, if you unfortunately haven't changed the previous file before kubeadm init, this will also work.
Remember to use systemctl daemon-reload if changed the service configuartion file this way.
Network modification is also needed, like the official documentation of bootstraping, tell system to use iptables is important:
cat <<EOF >  /etc/sysctl.d/k8s.conf
net.bridge.bridge-nf-call-ip6tables = 1
net.bridge.bridge-nf-call-iptables = 1
EOF
sysctl --system
As I decided to use flannel as CNI inside cluster, the cni configuration file will be generated to /etc/cni/net.d/ , backup and delete every file in this folder thus old configurations will not conflict with later setting in flannel.
BTW, use Ansible manage cluster is very helpful, in host machine of VMs, In RHEL 8, this package is available via repo Red Hat Ansible Engine 2.8 for RHEL 8, or use pip pip3 install --user ansible.
After the installation make sure current account have privilege to each one of your nodes, and write down a .ini file to note them, for example:
[all]
kube-centos-master
kube-centos-node-1
kube-centos-node-2
kube-centos-node-3
kube-centos-ceph-1
kube-centos-ceph-2
The kube-centos-* stands for the host name of node, replace with it's IP address also works perfectly.
And to execute commands around nodes, use ansible -i hosts.ini --user root all -m shell -a 'ip a', for example this commands means, use hosts.init file, as user root across [all] nodes, execute shell command ip a.
Init
Now with everything we need to prepare, in master node, we can use kubeadm init --cri-socket="/var/run/crio/crio.sock" --pod-network-cidr=10.244.0.0/16 to start up Kubernetes master node;--cri-socket="/var/run/crio/crio.sock" is for CRI-O the socket is where CRI-O utilize the UNIX socket for network, and --pod-network-cidr=10.244.0.0/16 is required for default setting by flannel, the VXLAN will be in this subnet by default. then the output should be:
[init] using Kubernetes version: v1.16.1
[preflight] running pre-flight checks
......
[addons] Applied essential addon: CoreDNS
[addons] Applied essential addon: kube-proxy

Your Kubernetes master has initialized successfully!

To start using your cluster, you need to run the following as a regular user:

  mkdir -p $HOME/.kube
  sudo cp -i /etc/kubernetes/admin.conf $HOME/.kube/config
  sudo chown $(id -u):$(id -g) $HOME/.kube/config

You should now deploy a pod network to the cluster.
Run "kubectl apply -f [podnetwork].yaml" with one of the options listed at:
  https://kubernetes.io/docs/concepts/cluster-administration/addons/

You can now join any number of machines by running the following on each node
as root:

  kubeadm join [your master node ip] --token [token] --discovery-token-ca-cert-hash sha256:[hash]
It will warn you if the kubelet is not enabled in systemd, use systemctl enable kubelet to fix that, and run the mkdir .. chown part from the out put, this copies the Kubernetes authentication and configuration to you own home folder.
Now the kubectl client can be use to gathering information from cluster, but in this time kubectl get nodes will give you back for example:
NAME                STATUS    ROLES     AGE    VERSION
kube-centos-master  NotReady  Master    1m     1.16.1
This is because the network plugin haven't been installed and CRI-O is missing cni network due to previous deletion of configuration file, wait no more and apply flannel yaml file to fix this.
Flannel
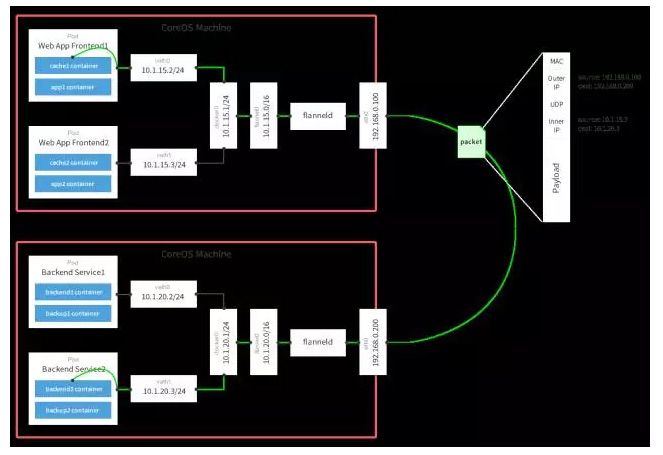
Flannel should be the most simplest network plugin in Kubernetes compare to Calico etc, this relies on just your cluster network communicating and dynamically insert iptables rule to nodes, Calico in the other hand more integrated with BGP(Border Gateway Protocol), that will be another story in another day.

I recommend to download the yaml file to you own machine and apply it, by the time of writing this article, official kuberadm documentation recommends to use
kubectl apply -f https://raw.githubusercontent.com/coreos/flannel/2140ac876ef134e0ed5af15c65e414cf26827915/Documentation/kube-flannel.ymlThis yml file should be altered by environment, especially by specify the network device in the node, e.g. every node is using eth0 as the network communication device, and change here:
kind: ClusterRole
apiVersion: rbac.authorization.k8s.io/v1beta1
rules:
......
      containers:
      - name: kube-flannel
......
        args:
        - --ip-masq
        - --kube-subnet-mgr
        - --iface=eth0 #add this line in order to pass device to container
For flannel plugin, after it haven been applied, try kubectl get po -n kube-system until you see the flannel plugin is in Running status, and use systemctl restart crio to reload the configuration file, the new configuration file is generated in /etc/cni/net.d/ folder, and CRI-O should read that and now the master node should be in Ready status.
Other problem eventually encounters is cniVersion problem, flannel refused to start up in container because the version in configuration file generated by default is 0.2.0, after changed it to 0.4.0 in /etc/cni/net.d/10-flannel.conflist, also, change template in the yaml file to deploy flannel.
Check the network use ip a command, example output:

The cni0 and flannel.1 needs to be in one subnet in order to function, cni0 should be bring up by CRI-O and flannel, if this network is missing, try restart them and reset settings.
Join
After the network as been set up in master node, worker node can join the cluster now, simply do the preparation work on every node and use the command provided by kubeadm init append --cri-socket argument to do the job, for example,
kubeadm join [your master node ip] --token [token] --discovery-token-ca-cert-hash sha256:[hash] --cri-socket="/var/run/crio/crio.sock"
Remember to delete files under the /etc/cni/net.d/ folder to get new config file applied, once joined the cluster, flannel and kube-proxy will be deployed to every node by default, if node is not marked ready, and there is network issue when using kubectl describe node [node here] , try restart CRI-O and check the setting.
Smoke testing
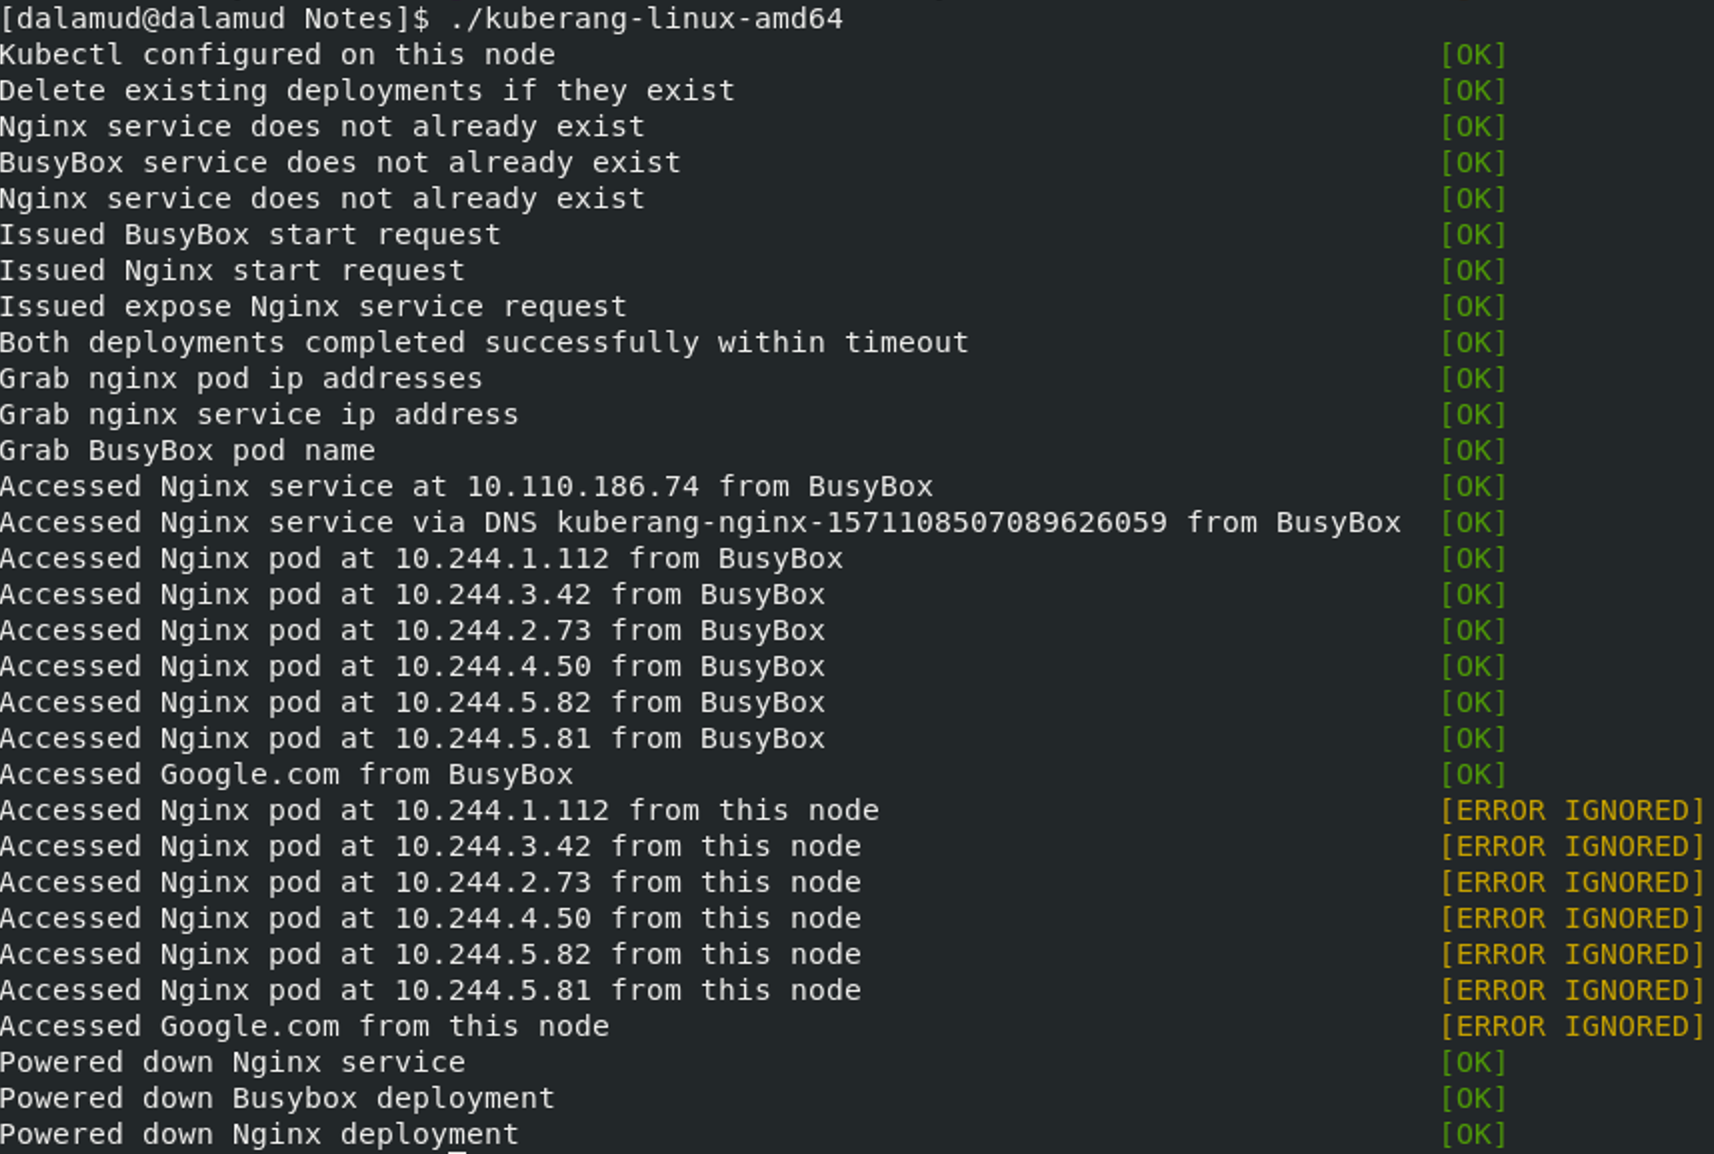
After the installation, start a testing to ensure every thing works is important, we could start two bash in different and do the manual test, but there is also tool to do that, named kuberang.
Refer to: https://github.com/apprenda/kuberang
Download the go binary here and run in your control plane, if everything is marked [OK] then the Bootstrapping of Kubernetes is done.

Since I have moved out the control plane from master node to host machine, the pod can't be accessed from here, it should be [OK] from master node.
Storage haven't been setting up and as well as the Ingress control. It will be noted another day.
And finally enjoy a day with a working Kubernetes cluster.


