Overview
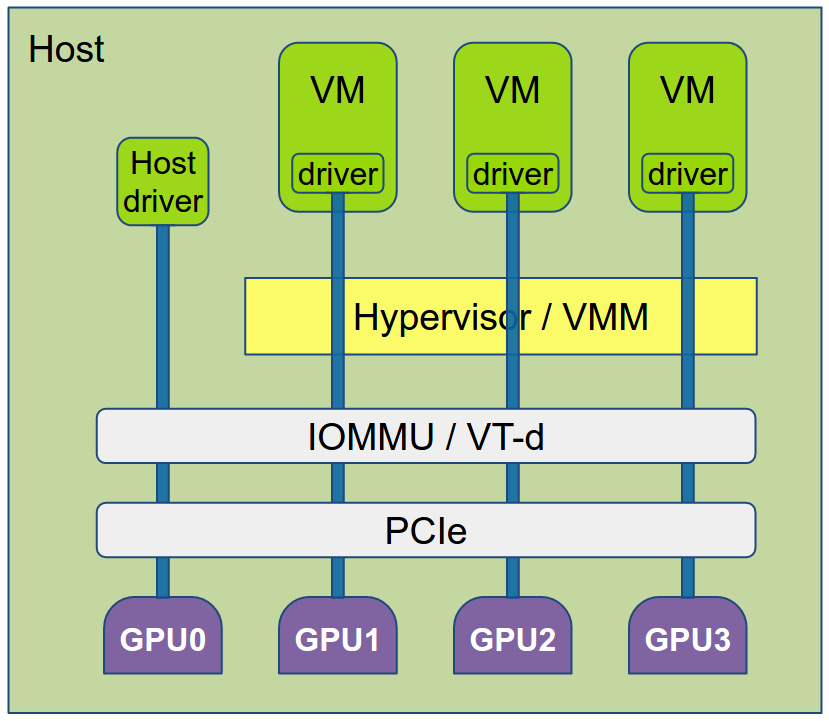
GPU passthrough on Proxmox VE host enable the guest to provide bare metal like experience - no RDP, no streaming. This creates a limit that per GPU could only be used in 1 guest, but it is still powerful while easier to configure and requires less advanced GPU.
Before we start, make sure host device passthrough and GPU passthrough is configured. If they are not, follow the first article in the series:

Install Operating System and Drivers
Create a virtual machine for Windows:
export VMID=100
qm create $VMID --name windows-ltsc \
                --ostype win10 \
                --sockets 1 --cores 8 \
                --memory 24576 \
                --net0 virtio,bridge=vmbr0,firewall=1 \
                --scsi local-lvm:200 \
                --cdrom0 <Windows Installation ISO> \
                --cdrom1 <Virtio Drivers ISO> \
                --boot order=cdrom0\;scsi0
Then start the machine by qm start $VMID and finish the installation of Windows.
Now, at this point only VirtIO drivers need to be installed after Windows installation since no GPU passthrough is configured.
Setup GPU Passthrough and Install Drivers
Add GPU as a PCI device and disable built-in display:
export GPU_LOC="0000\:01\:00.0"
qm set $VMID --hostpci0 device-id=${GPU_LOC},pcie=1,x-vga=1
qm set $VMID --vga type=none
Connect an external monitor to the GPU and start the VM instance. Now Windows should pick up the GPU and display something on the external monitor, and we can proceed to GPU driver installation.
Issue Hunting
Fix mmap Failure on PVE 7.2+
On PVE 7.2 and later, mmap might fail. To fix the problem:
#!/bin/bash
echo 1 > /sys/bus/pci/devices/${GPU_LOC}/remove
echo 1 > /sys/bus/pci/rescan
Hide KVM from Guest
PVE already hides itself from NVIDIA driver out of the box. Yet we still need to set hv_vendor_id and kvm=off to run some specified games:
qm set $VMID -args "-cpu 'host,-hypervisor,+kvm_pv_unhalt,+kvm_pv_eoi,hv_spinlocks=0x1fff,hv_vapic,hv_time,hv_reset,hv_vpindex,hv_runtime,hv_relaxed,kvm=off,hv_vendor_id=Proxmox'"
We can use qm showcmd $QMID to check the actual qemu command-line generated by PVE.


