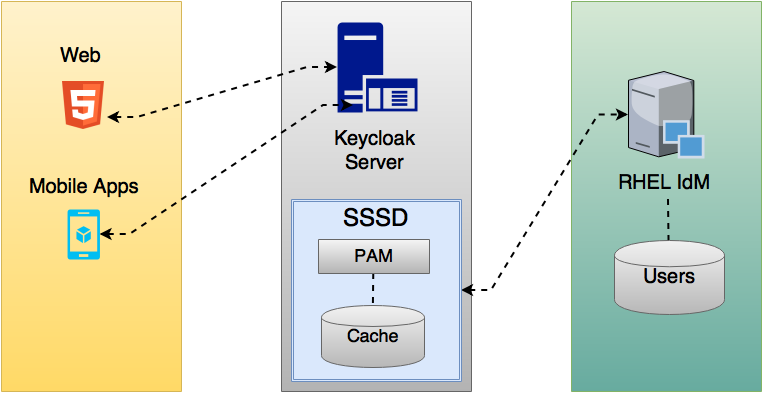
Initialize FreeIPA Container Data
The official FreeIPA container image requires a one-time installation process before running. For installation, a file containing ipa-server-install options should be provided, and Docker command should be ipa-server-install -U.
To complete this one-time process, create a docker-compose YAML file:
version: "3"
services:
  "central":
    container_name: "ipa-central"
    image: "docker.io/freeipa/freeipa-server:${FREEIPA_VERSION:-centos-8-stream}"
    command: "ipa-server-install -U"
    volumes:
      - "/sys/fs/cgroup:/sys/fs/cgroup:ro"
      - "./ipa-central/data:/data"
      - "./ipa-central/freeipa.options:/data/ipa-server-install-options"
    read_only: true
    hostname: "${FREEIPA_HOSTNAME}"
    sysctls:
net.ipv6.conf.all.disable_ipv6: 0install.ymlThen start the process by docker-compose -f install.yml up. After installation is success, start the FreeIPA server container with docker-compose -f run.yml up:
version: "3"
services:
  "central-ipa":
    container_name: "ipa-central"
    image: "docker.io/freeipa/freeipa-server:${FREEIPA_VERSION:-centos-8-stream}"
    volumes:
      - "/sys/fs/cgroup:/sys/fs/cgroup:ro"
      - "./ipa-central/data:/data"
    read_only: true
    ports:
      - 127.0.0.1:9443:443
      - 389:389
      - 636:636
      - 88:88
      - 88:88/udp
      - 464:464
      - 464:464/udp
      - 123:123/udp
    hostname: "${FREEIPA_HOSTNAME}"
    sysctls:
net.ipv6.conf.all.disable_ipv6: 0run.ymlPost-installation Setup
LDAP Service Account
There are some LDAP clients that need a pre-configured account. Do not use the Directory Manager account to authenticate remote services to the IPA LDAP server. A service account could be created like this:
[root@ipa /]# ldapmodify -x -D 'cn=Directory Manager' -W
Enter LDAP Password: <FreeIPA Directory Password>
dn: uid=authenticator,cn=serviceaccounts,cn=etc,dc=sakuragawa,dc=cloud
changetype: add
objectclass: account
objectclass: simplesecurityobject
uid: authenticator
userPassword: <password>
passwordExpirationTime: 20380119031407Z
nsIdleTimeout: 0

adding new entry "uid=authenticator,cn=serviceaccounts,cn=etc,dc=sakuragawa,dc=cloud"
<Ctrl-D>
The reason to use an account like this rather than creating a normal user account in IPA and using that is that the system account exists only for binding to LDAP. It is not a real POSIX user, can’t log into any systems and doesn’t own any files.
This use also has no special rights and is unable to write any data in the IPA LDAP server, only read.
References:

Allow Anonymous to Read mail Attribute
By default only bound (or authenticated) users are allowed to read mail attribute. For internal usage, querying the attribute anonymously is safe.
$ ipa permission-add 'Mail Readable by Anonymous' --type=user --attrs=mail --bindtype=anonymous --permissions=read
Upgrade Containerized FreeIPA
theoretically, after image is changed, FreeIPA container will start upgrade process automatically. But there was some common issues during the upgrade.
DIRSRV Failed to Start
So if an instance was created with early 8.5 builds, a plugin entry (dn: cn=GOST_YESCRYPT,cn=Password Storage Schemes,cn=plugins,cn=config) was created. Then the upgrade removed the init callback and startup fails.
A quick relief is by editing dse.ldif and removing cn=GOST_YESCRYPT,cn=Password Storage Schemes,cn=plugins,cn=config.
SSSD Failed to Start
SSSD will fail to start if the permission and owner of configuration file at/etc/sssd/sssd/.conf isn't set properly.
# chown root /etc/sssd/sssd.conf
# chgrp root /etc/sssd/sssd.conf
# chmod 600  /etc/sssd/sssd.conf
Deploy KeyCloak Container
version: "3"
services:
  "central-sso":
    container_name: "keycloak-central"
    image: "quay.io/keycloak/keycloak:${KEYCLOAK_VERSION:-14.0.0}"
    ports:
      - 127.0.0.1:9080:8080
      - 127.0.0.1:9990:9990
    environment:
      DB_VENDOR: "mariadb"
      DB_ADDR: "db-master.example.com"
      DB_PORT: "3306"
      DB_DATABASE: "keycloak_skg"
      DB_USER: "keycloak"
      DB_PASSWORD: "${DB_PASSWORD}"
      PROXY_ADDRESS_FORWARDING: "true"
      KEYCLOAK_USER: "admin"
      KEYCLOAK_PASSWORD: "${KEYCLOAK_PASSWORD}"
Note that it is important to set PROXY_ADDRESS_FORWARDING=true in environment variables especially when KeyCloak is served behind a reverse proxy.


Securing Services Behind OAuth2Proxy
Generate a cookie secret first:
$ export OAUTH2_PROXY_COOKIE_SECRET=`python -c 'import os,base64; print(base64.urlsafe_b64encode(os.urandom(16)).decode())'`Then we will create a sakuragawa-sso.env to store all authentication backed related environment variables. Since there is still issues with Keycloak backend, we will turn to use OpenID Connect (OIDC) backend here.
OAUTH2_PROXY_PROVIDER=oidc
OAUTH2_PROXY_PROVIDER_DISPLAY_NAME=Sakuragawa SSO
OAUTH2_PROXY_CLIENT_ID=<client ID>
OAUTH2_PROXY_CLIENT_SECRET=<client secret>
OAUTH2_PROXY_OIDC_ISSUER_URL=https://sso.central.sakuragawa.cloud/auth/realms/SKG
OAUTH2_PROXY_INSECURE_OIDC_ALLOW_UNVERIFIED_EMAIL=true
OAUTH2_PROXY_ALLOWED_GROUPS=<keycloak group 1>, <keycloak group 2>sakuragawa-sso.envThen create an orchestration file which includes global settings:
version: "3"
services:
  auth:
    image: "quay.io/oauth2-proxy/oauth2-proxy:latest"
    ports:
      - "127.0.0.1:8180:4180"
    environment:
      OAUTH2_PROXY_UPSTREAMS: "http://<upstream>:5000/"
      OAUTH2_PROXY_WHITELIST_DOMAINS: ".central.sakuragawa.cloud:*"
      OAUTH2_PROXY_HTTP_ADDRESS: ":4180"
      OAUTH2_PROXY_COOKIE_SECRET:
      OAUTH2_PROXY_REVERSE_PROXY: "true"
      OAUTH2_PROXY_EMAIL_DOMAINS: "example.com,example.org"
      OAUTH2_PROXY_PASS_USER_HEADERS: "true"
    env_file:
      - sakuragawa-sso.env
    restart: "unless-stopped"
docker-compose.ymlReferences


